Crispy Beef Cheese Burritos – Better Than Takeout
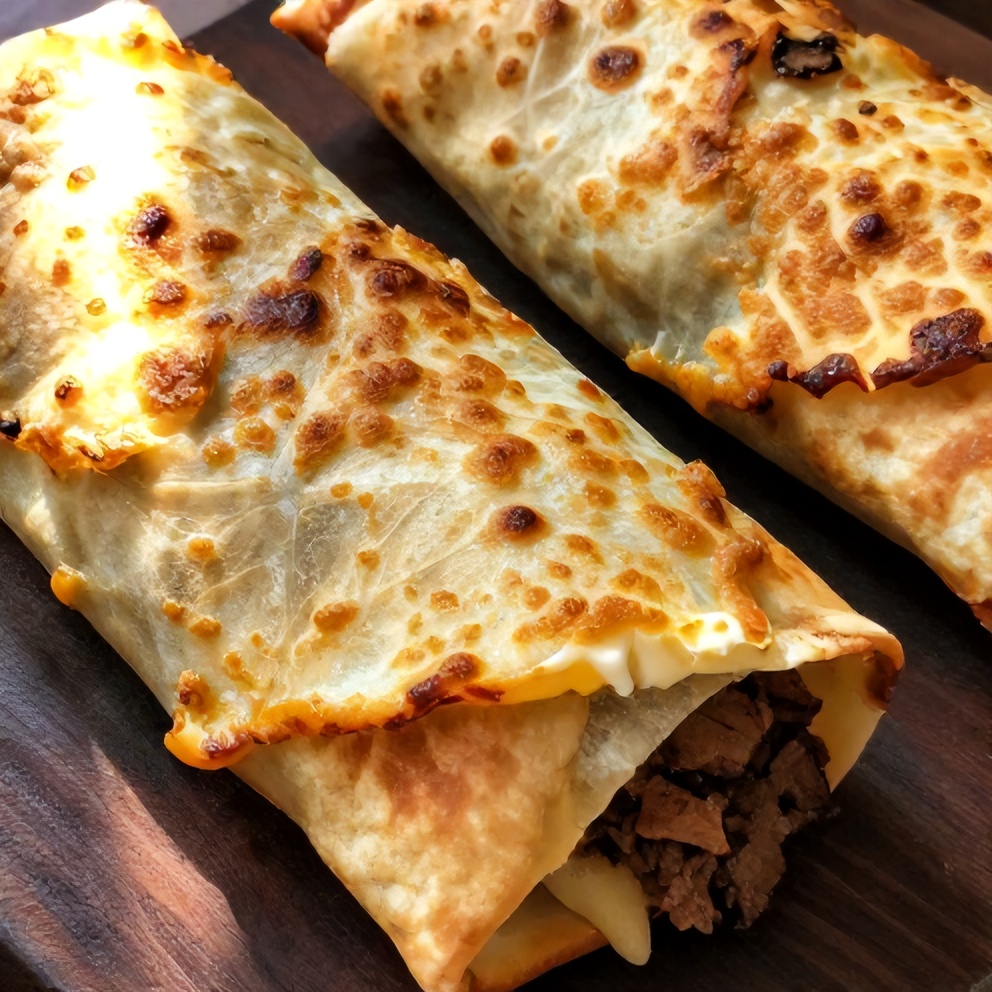
Crispy beef cheese burritos are the ultimate quick dinner solution. After making this recipe dozens of times, I’ve discovered the trick to getting that perfect, golden, melty cheese crust. Keep reading for my best tips, or jump straight to the recipe card. Looking for more dinner inspiration? Try my 20 Minute Sweet and Spicy Noodles or Big Mac Tacos (Crispy Smash Burger Tacos). If you love recipes like this, you’ll also enjoy Crispy Salmon Bowls and Big Mac Tacos (Crispy Smash Burger Tacos).
Why This Crispy Beef Cheese Burritos – Better Than Takeout Is Pure Comfort
- Golden, melty cheese crust
- Savory beef and cheese flavors
- Crispy texture on the outside, tender on the inside
- Easy to customize with your favorite toppings
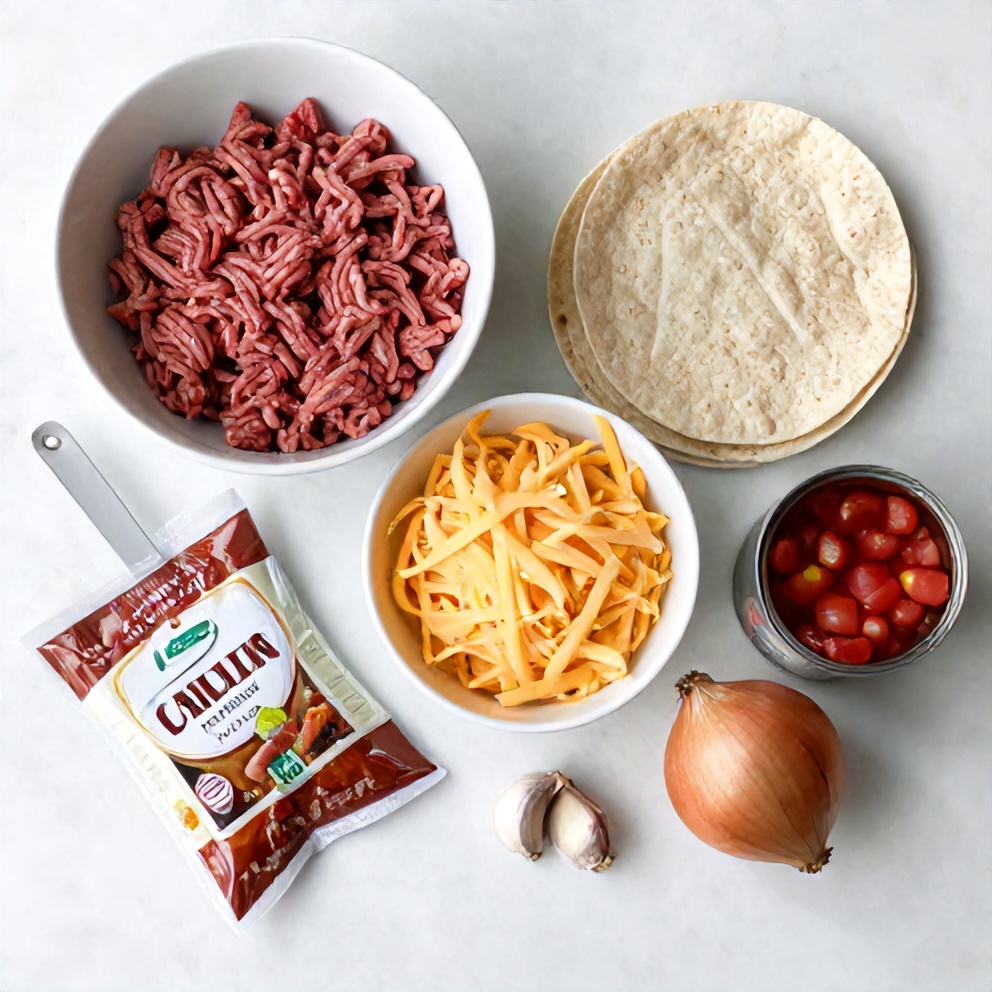
What You'll Need for Crispy Beef Cheese Burritos – Better Than Takeout
Choosing the right ingredients makes a big difference, but this recipe is forgiving enough to work with what you have.
- 1 lb ground beef
- 1 cup shredded cheddar cheese
- 10 small flour tortillas
- 1 packet taco seasoning
- 1 small onion, diced
- 1 clove garlic, minced
- 1 (15 oz) can diced tomatoes, drained
- Optional: Shredded lettuce
- Optional: Diced tomatoes
- Optional: Sour cream
- Optional: Guacamole
- Optional: Salsa
- Optional: Fresh cilantro
📝 Ingredient Notes
- ground beef: You can use ground turkey or chicken as a substitute.
🛒 Tools & Equipment I Recommend
- Cast iron skillet — Even heat distribution for perfectly crispy burritos. → See on Amazon
- Meat thermometer — Ensures your beef is cooked to a safe temperature. → See on Amazon

How to Make Crispy Beef Cheese Burritos – Better Than Takeout
- Step 1: Brown the ground beef, onion, and garlic in a large skillet over medium heat. Drain excess fat.
- Step 2: Stir in the taco seasoning, diced tomatoes, and 1/4 cup water. Simmer for 5 minutes.
- Step 3: Spoon the beef mixture onto a tortilla, top with shredded cheese, and fold into a burrito. Repeat with remaining tortillas and filling.
- Step 4: Heat a large skillet over medium heat. Place the burritos seam-side down and cook until golden and crispy, about 2-3 minutes per side.
- Step 5: Transfer the burritos to a baking sheet and bake at 375°F (190°C) for 10-15 minutes, or until the cheese is melted and bubbly. Serve with your favorite toppings.
Cook's Tips for Perfect Crispy Beef Cheese Burritos – Better Than Takeout
- Common mistake and fix: Don't overfill your burritos. Too much filling can make them difficult to fold and may cause the filling to leak during cooking.
- Pro tip: For extra crispy burritos, lightly brush the tortillas with oil before folding.
- Pro tip: To make ahead, assemble the burritos but don't cook them. Store in the refrigerator for up to 24 hours. Cook as directed.
Storing & Reheating Crispy Beef Cheese Burritos – Better Than Takeout
Short-Term Storage
Store in an airtight container in the fridge. Store leftovers in an airtight container in the refrigerator for up to 3 days. Make-ahead tip: You can assemble the burritos up to 24 hours ahead of time. Store in the refrigerator until ready to cook.
Freezing Crispy Beef Cheese Burritos – Better Than Takeout
Freeze uncooked burritos for up to 3 months. Thaw overnight in the refrigerator before cooking.
How to Reheat Without Drying It Out
Oven: Reheat in the oven at 375°F (190°C) for 10-15 minutes, or until heated through. Microwave: Reheat in the microwave for 1-2 minutes, or until heated through. The texture may not be as crispy.
Recipe Notes
- Chef tip: For a spicier burrito, add diced jalapeños to the beef mixture.
- Best substitution: Substitute the ground beef with cooked, shredded chicken or turkey.
- Make-ahead: Assemble the burritos up to 24 hours ahead of time. Store in the refrigerator until ready to cook.
- Scaling: This recipe can be easily doubled or tripled to serve a larger crowd.
- Troubleshooting: If your burritos are not crispy enough, try cooking them in a bit more oil or broiling them for a few minutes after baking.
Want to level up this recipe?
High-quality tortillas — Ensure your burritos have a perfect texture and hold their shape during cooking. → Check price on Amazon
Crispy Beef Cheese Burritos – Better Than Takeout
Ingredients
Main Ingredients
- 1 lb ground beef
- 1 cup shredded cheddar cheese
- 10 small flour tortillas
Seasonings
- 1 packet taco seasoning
- 1 small onion, diced
- 1 clove garlic, minced
- 1 (15 oz) can diced tomatoes, drained
Optional Toppings
- Shredded lettuce
- Diced tomatoes
- Sour cream
- Guacamole
- Salsa
- Fresh cilantro
Instructions
- Step 1: Brown the ground beef, onion, and garlic in a large skillet over medium heat. Drain excess fat.
- Step 2: Stir in the taco seasoning, diced tomatoes, and 1/4 cup water. Simmer for 5 minutes.
- Step 3: Spoon the beef mixture onto a tortilla, top with shredded cheese, and fold into a burrito. Repeat with remaining tortillas and filling.
- Step 4: Heat a large skillet over medium heat. Place the burritos seam-side down and cook until golden and crispy, about 2-3 minutes per side.
- Step 5: Transfer the burritos to a baking sheet and bake at 375°F (190°C) for 10-15 minutes, or until the cheese is melted and bubbly. Serve with your favorite toppings.
Notes
- Chef tip: For a spicier burrito, add diced jalapeños to the beef mixture.
- Best substitution: Substitute the ground beef with cooked, shredded chicken or turkey.
- Make-ahead: Assemble the burritos up to 24 hours ahead of time. Store in the refrigerator until ready to cook.
- Scaling: This recipe can be easily doubled or tripled to serve a larger crowd.
- Troubleshooting: If your burritos are not crispy enough, try cooking them in a bit more oil or broiling them for a few minutes after baking.
Storage
- Fridge: Store leftovers in an airtight container in the refrigerator for up to 3 days.
- Freezer: Freeze uncooked burritos for up to 3 months. Thaw overnight in the refrigerator before cooking.
- Oven reheat: Reheat in the oven at 375°F (190°C) for 10-15 minutes, or until heated through.
- Microwave reheat: Reheat in the microwave for 1-2 minutes, or until heated through. The texture may not be as crispy.
- Make ahead: You can assemble the burritos up to 24 hours ahead of time. Store in the refrigerator until ready to cook.
Nutrition Per Serving
- Calories: 350
- Protein: 20g
- Fat: 21g
- Carbs: 22g
- Fiber: 2g
- Sugar: 2g
- Sodium: 700mg
- Cholesterol: 55mg
- Sat. Fat: 10g
Nutritional values are estimates only. Actual values may vary by brand and portion size.
Crispy Beef Cheese Burritos – Better Than Takeout FAQs
Yes, you can assemble the burritos up to 24 hours ahead of time. Store in the refrigerator until ready to cook.
Overfilling the burritos or not cooking them long enough can cause them to be soggy. Make sure to fold the burritos tightly and cook them until golden and crispy.
Yes, you can freeze uncooked burritos for up to 3 months. Thaw overnight in the refrigerator before cooking.
Yes, cook the burritos at 375°F (190°C) for 8-10 minutes, or until heated through and golden.
Reheat in the oven at 375°F (190°C) for 10-15 minutes, or until heated through. The texture may not be as crispy as when first cooked.
A Warm Final Note
I can’t wait for you to try Crispy Beef Cheese Burritos – Better Than Takeout and see how effortlessly it comes together. When you make it, pop back here and leave a rating or share how it turned out — I love hearing from you!