Easy Crispy Mini Cheese Danishes

Easy mini cheese danishes are a quick and delicious treat. I’ve made these dozens of times and know the secret to perfect layers. Crispy and creamy, they melt in your mouth. Try my protein balls for a healthy snack. Jump to Recipe If you love recipes like this, you’ll also enjoy Easy Strawberry Cheesecake Protein Balls and No-Bake Chocolate Fridge Cake.
Why This Easy Crispy Mini Cheese Danishes Is Pure Comfort
- Crispy and flaky texture
- Sweet and creamy filling
- Perfect for breakfast
- Easy to make
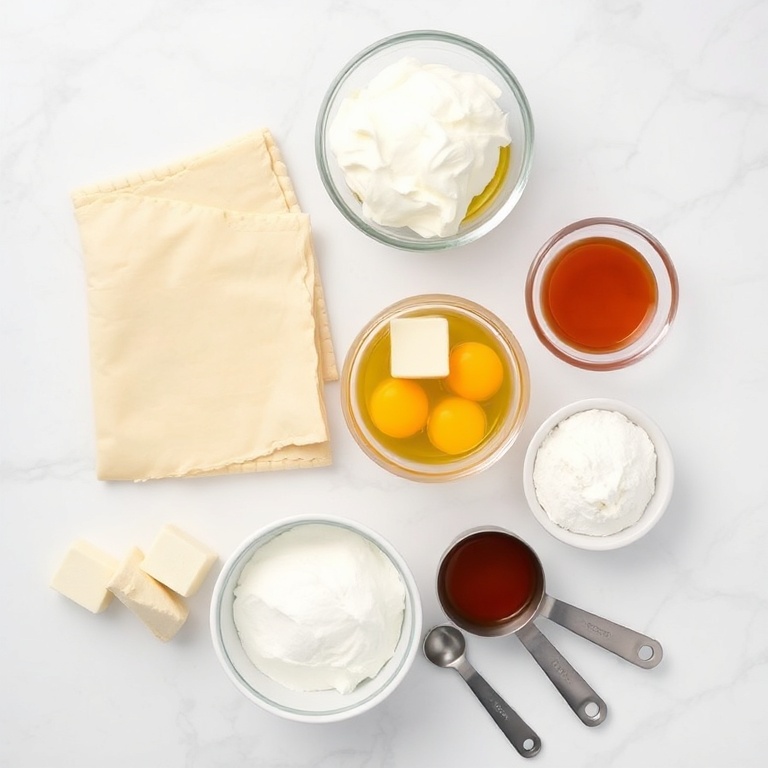
What You'll Need for Easy Crispy Mini Cheese Danishes
Choosing the right ingredients makes a big difference, but this recipe is forgiving enough to work with what you have.
- 1 sheet puff pastry, thawed
- 8 oz cream cheese, softened
- 1/4 cup granulated sugar
- 1 large egg
- 1 tsp vanilla extract
- Pinch of salt
- 1/2 tsp lemon zest (optional)
- Optional: Semi-sweet chocolate chips
- Optional: Powdered sugar for dusting
- Optional: Fresh berries
📝 Ingredient Notes
- Puff pastry: Use high-quality pastry for best results
- Cream cheese: Make sure it's softened for easy mixing
🛒 Tools & Equipment I Recommend
- Baking Sheet — Ensures even baking and prevents sticking → See on Amazon
- Pastry Brush — Helps apply egg wash smoothly → See on Amazon

How to Make Easy Crispy Mini Cheese Danishes
- Step 1: Preheat oven to 400°F. Line a baking sheet with parchment paper.
- Step 2: In a bowl, mix cream cheese, sugar, egg, and vanilla until smooth. Add salt and lemon zest if using.
- Step 3: Unroll puff pastry and cut into 6 equal squares. Place on baking sheet.
- Step 4: Spoon a small amount of filling in the center of each pastry square. Fold the corners into the center to form a diamond shape.
- Step 5: Brush the tops with egg wash and bake for 12–15 minutes until golden and puffed.
- Step 6: Let cool slightly before serving. Dust with powdered sugar if desired.
Cook's Tips for Perfect Easy Crispy Mini Cheese Danishes
- Baking Tip: Use a sharp knife to cut the puff pastry for clean edges
- Common mistake and fix: If the pastry collapses, it may be undercooked. Bake a few more minutes
- Flavor Enhancement: Add a pinch of nutmeg for a warm, aromatic flavor
- Storage: Store in an airtight container for up to 2 days
Storing & Reheating Easy Crispy Mini Cheese Danishes
Short-Term Storage
Store in an airtight container in the fridge. Store in an airtight container for up to 2 days Make-ahead tip: Make and freeze up to 1 month
Freezing Easy Crispy Mini Cheese Danishes
Freeze in a single layer for up to 1 month
How to Reheat Without Drying It Out
Oven: Reheat in a preheated 350°F oven for 5–7 minutes Microwave: Use low power for 10–15 seconds
Recipe Notes
- Chef tip: For extra flakiness, chill the pastry before cutting
- Best substitution: Use Greek yogurt instead of cream cheese for a lighter version
- Make-ahead: Prepare and freeze the danishes before baking
- Scaling: Double the recipe for a larger batch
- Troubleshooting: If the filling is too runny, add more cream cheese
Want to level up this recipe?
Egg Wash Cup — Makes applying egg wash easier and more precise → Check price on Amazon
Easy Crispy Mini Cheese Danishes
Ingredients
Main Ingredients
- 1 sheet puff pastry, thawed
- 8 oz cream cheese, softened
- 1/4 cup granulated sugar
- 1 large egg
- 1 tsp vanilla extract
Seasonings
- Pinch of salt
- 1/2 tsp lemon zest (optional)
Optional Toppings
- Semi-sweet chocolate chips
- Powdered sugar for dusting
- Fresh berries
Instructions
- Step 1: Preheat oven to 400°F. Line a baking sheet with parchment paper.
- Step 2: In a bowl, mix cream cheese, sugar, egg, and vanilla until smooth. Add salt and lemon zest if using.
- Step 3: Unroll puff pastry and cut into 6 equal squares. Place on baking sheet.
- Step 4: Spoon a small amount of filling in the center of each pastry square. Fold the corners into the center to form a diamond shape.
- Step 5: Brush the tops with egg wash and bake for 12–15 minutes until golden and puffed.
- Step 6: Let cool slightly before serving. Dust with powdered sugar if desired.
Notes
- Chef tip: For extra flakiness, chill the pastry before cutting
- Best substitution: Use Greek yogurt instead of cream cheese for a lighter version
- Make-ahead: Prepare and freeze the danishes before baking
- Scaling: Double the recipe for a larger batch
- Troubleshooting: If the filling is too runny, add more cream cheese
Storage
- Fridge: Store in an airtight container for up to 2 days
- Freezer: Freeze in a single layer for up to 1 month
- Oven reheat: Reheat in a preheated 350°F oven for 5–7 minutes
- Microwave reheat: Use low power for 10–15 seconds
- Make ahead: Make and freeze up to 1 month
Nutrition Per Serving
- Calories: 180
- Protein: 3g
- Fat: 10g
- Carbs: 15g
- Fiber: 1g
- Sugar: 6g
- Sodium: 120mg
- Cholesterol: 45mg
- Sat. Fat: 6g
Nutritional values are estimates only. Actual values may vary by brand and portion size.
Easy Crispy Mini Cheese Danishes FAQs
Yes, prepare and freeze the shapes before baking. Bake from frozen for 15–18 minutes
Sogginess can happen if the pastry isn’t fully cooked. Bake until golden and crisp
Yes, cook at 360°F for 8–10 minutes until golden
Use frozen biscuit dough or crescent rolls for a quick alternative
Add a touch of cinnamon or pumpkin spice for a fall twist
A Warm Final Note
I can’t wait for you to try Easy Crispy Mini Cheese Danishes and see how effortlessly it comes together. When you make it, pop back here and leave a rating or share how it turned out — I love hearing from you!